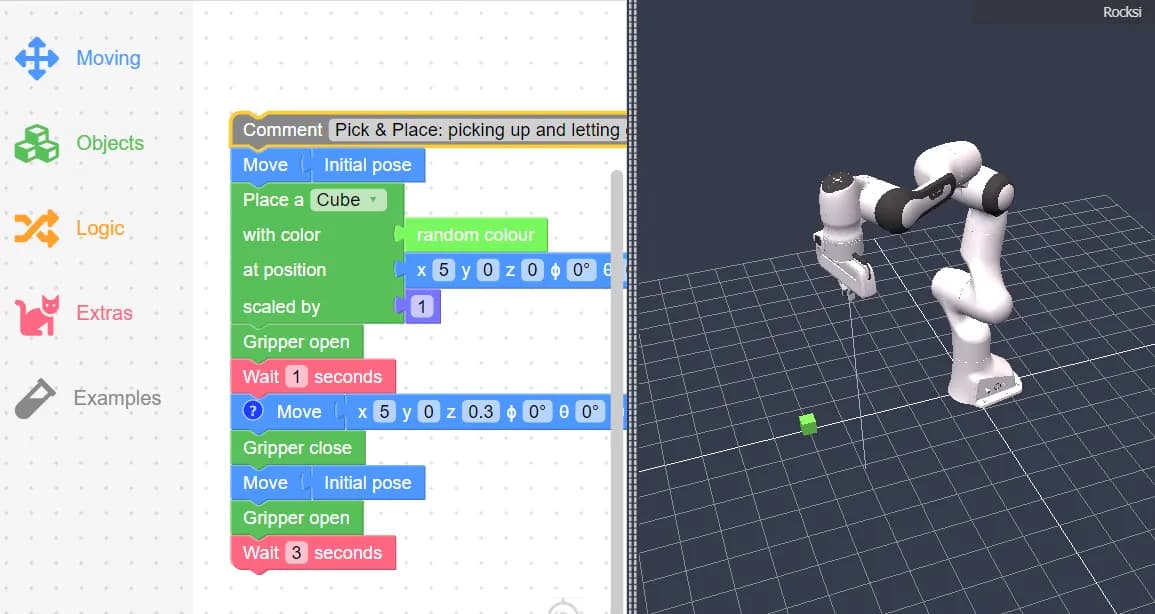
Welcome to Rocksi.net, a block-based programming platform designed specifically for children to learn coding by controlling a robotic arm. Similar to Scratch, Rocksi.net provides an intuitive environment where kids can engage with STEM concepts in a fun and interactive way. This guide will focus on using various blocks in Rocksi.net to control a 7 Degree of Freedom (7DOF) Franka Emika robotic arm simulator. By the end of this article, you’ll be familiar with the interface, movement, object interaction, logic, and extra blocks available on the platform.
1. Learn the Interface and Controls
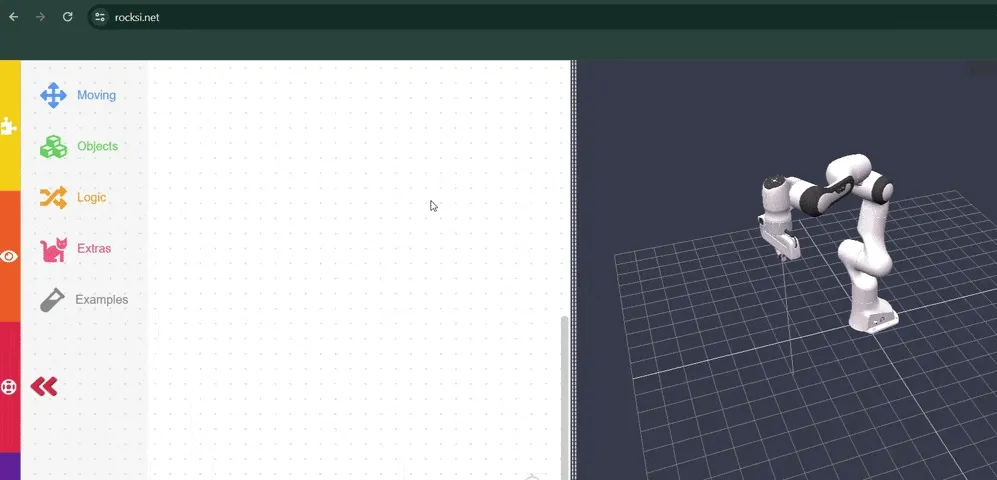
Before diving into the different blocks, it’s important to get acquainted with the Rocksi.net interface. To learn how to use the Rocksi Interface, check out the built-in video tutorial on the Rocksi website. Look for the moving red arrow in the lower left corner of the screen and click on it to start a video explanation of the interface.
2. Movement Blocks
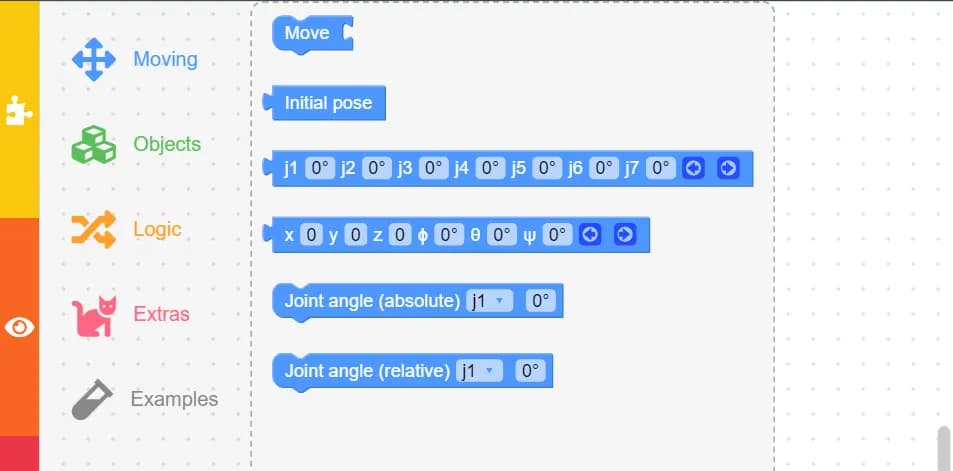
Understanding the movement blocks is crucial for controlling the Franka Emika robotic arm.
- Move: The Move block is used in combination with one of the three position blocks: initial pose, xyz, or j1-j7.
- Initial Pose: Sets the robotic arm to its starting position.
- j1/j2/j3/j4/j5/j6/j7: These blocks represent the seven joints of the robotic arm, allowing you to set specific angle positions for each joint.
- x/y/z/phi/theta/psi: Another notation for designating the position and rotation of the robotic arm.
You can manually adjust the values on these blocks, or position the robotic arm in the viewport and then transfer your positioning over to the blocks.
3. Object Blocks
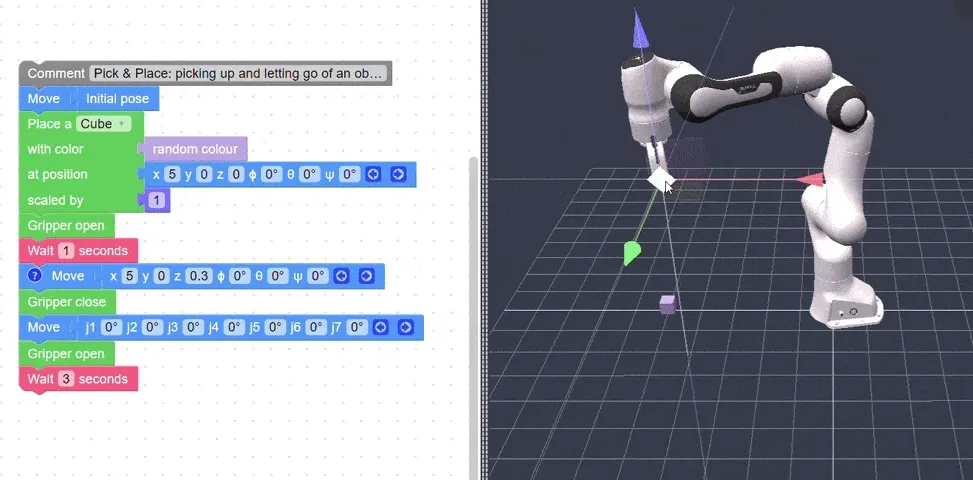
Object blocks enable simulated interaction with the robotic arm.
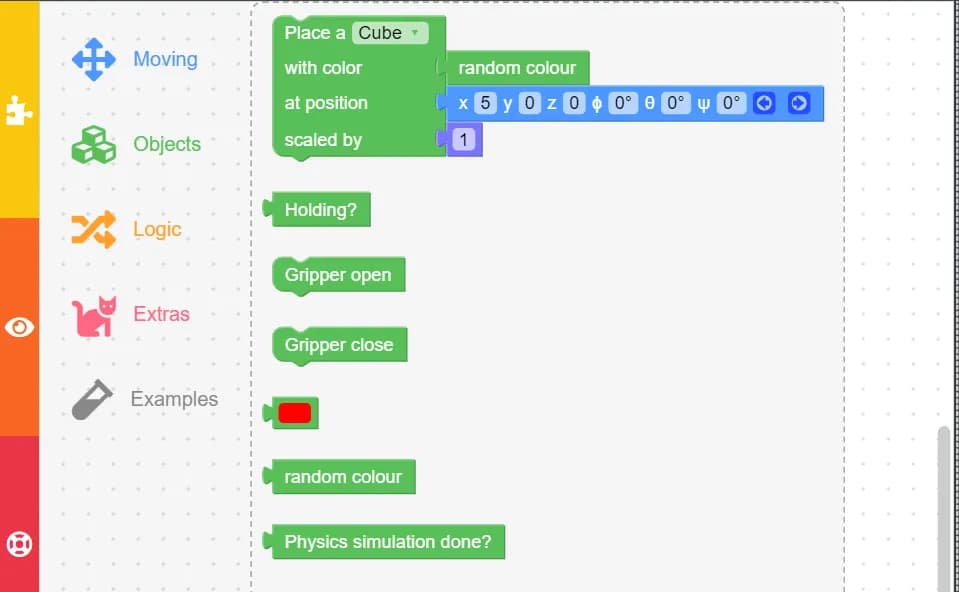
- Place a Cube: Places a cube in the simulation. You can choose its color, position, and size.
- Gripper Open and Gripper Close: Controls the gripper on the end of the robotic arm, used for picking up and dropping cubes.
4. Logic Blocks
Logic blocks introduce conditional operations and loops to your programs. These blocks will be familiar if you’ve used a block-based programming platform like Scratch before.
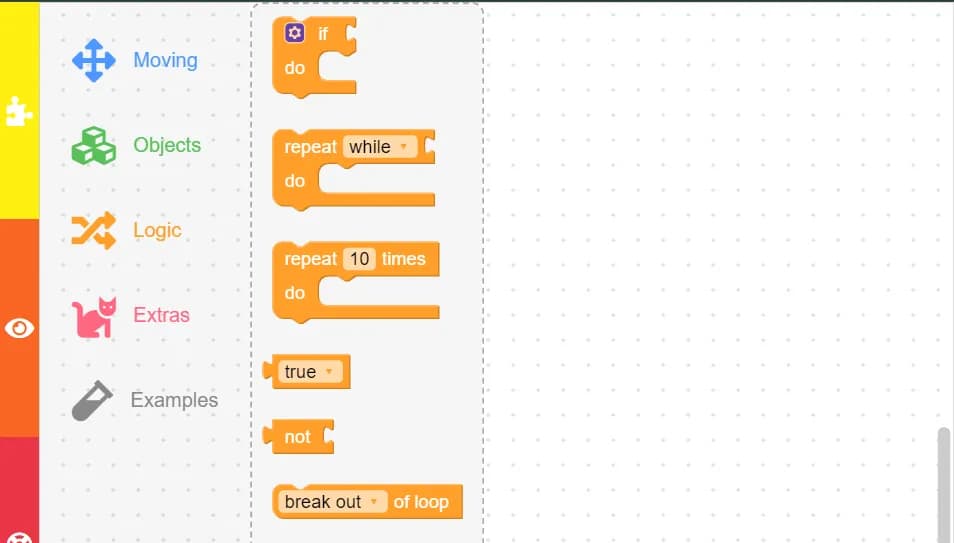
- If: Triggers certain responses or actions based on a condition.
- Repeat: Runs a set of blocks multiple times by wrapping them in a repeat block.
5. Extra Blocks
Extra blocks provide additional functionalities to enhance your programs.
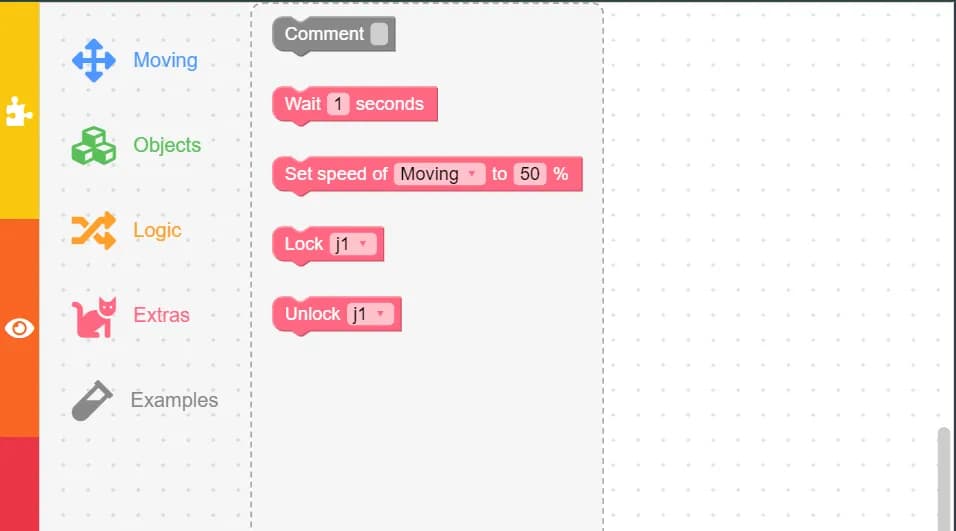
- Comment: Allows you to leave comments in your code for better organization and understanding.
- Wait: Adds a pause between actions, specified in seconds.
- Speed: Adjusts the speed of the robotic arm’s movements.
6. Example Blocks
Here’s an example set of blocks demonstrating a simple sequence:
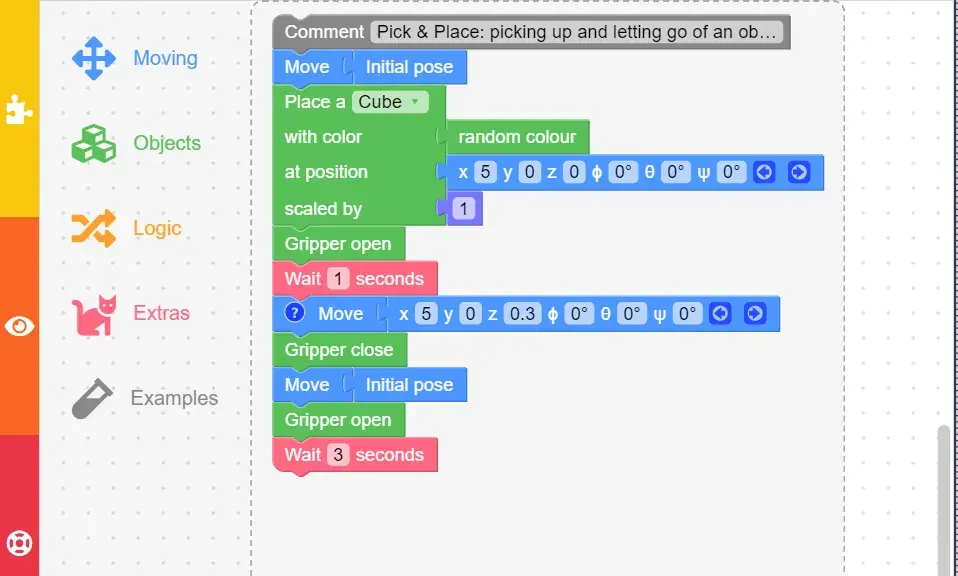
- Comment: Start of the sequence.
- Move: Set the robotic arm to the starting position.
- Place a Cube: Place a cube to be picked up.
- Gripper Open: Open the gripper to pick up the cube.
- Wait: Add a 1-second pause.
- Move: Position the arm to pick up the cube.
- Gripper Close: Close the gripper to grab the cube.
- Move: Move the arm to a different position (starting position chosen here).
- Gripper Open: Open the gripper to drop the cube.
- Wait: Add a 3-second pause.
- Repeat: Repeat the sequence as needed.
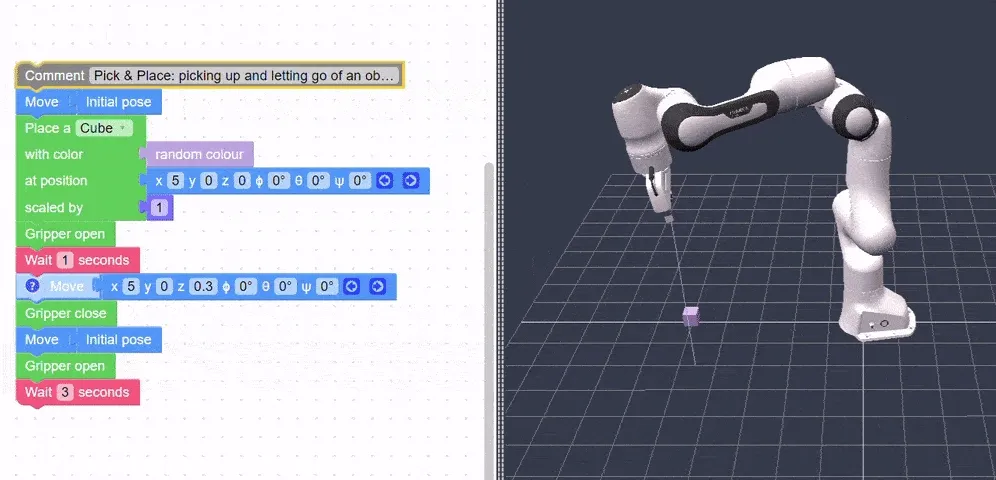
You can modify this example by adding additional cubes, spelling out something with the cubes, incorporating if logic, and using repetition blocks. The possibilities are endless with Rocksi.net!
Conclusion
Rocksi.net offers an engaging and educational platform for children to explore programming and robotics. By using block-based coding to control a 7DOF Franka Emika robotic arm, kids can develop critical thinking, problem-solving, and technical skills in a fun and interactive way. Dive into Rocksi.net today and start your journey into the world of robotics!
Thanks for reading! | Nathalie Meremikwu